

Upside-Down Orange Cake with Olive Oil
Moist, fragrant, and absolutely stunning

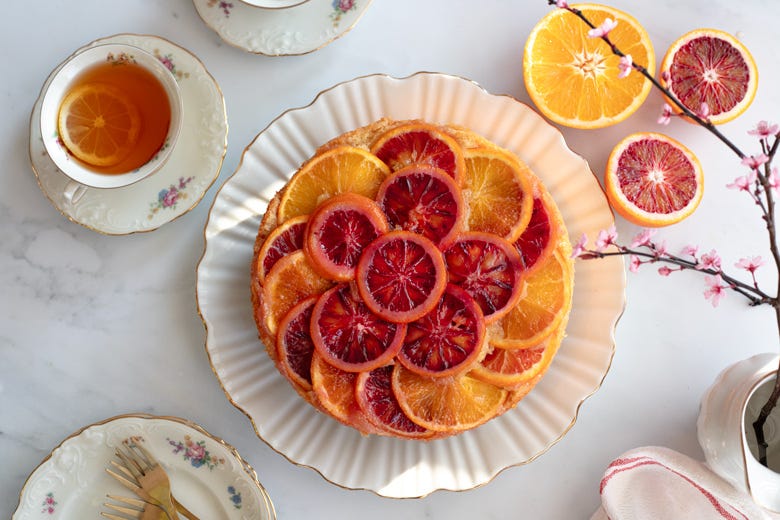
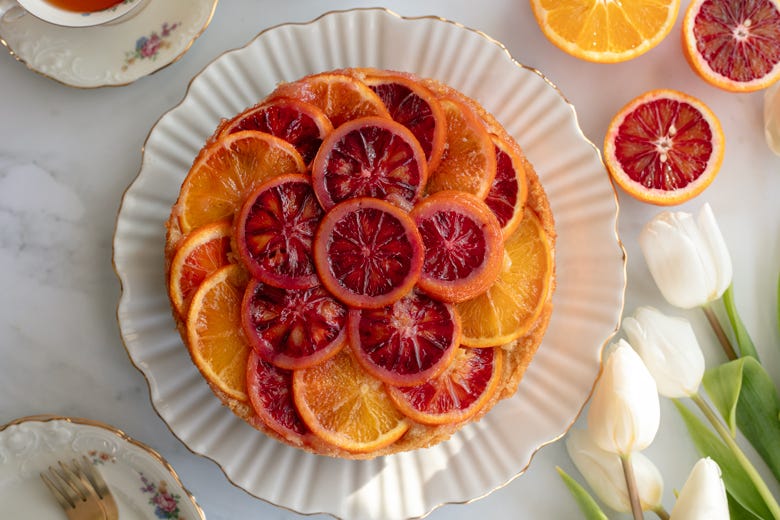
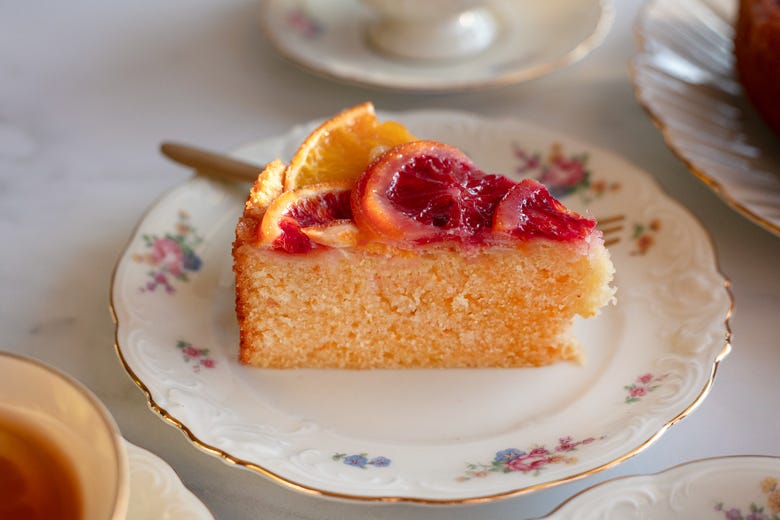
Close your eyes for a moment and imagine this: a golden cake emerging from the oven, the whole kitchen wrapped in the warm, citrusy perfume of fresh oranges. You flip it onto a plate, hold your breath... and there it is — glistening orange slices arranged like stained glass, caramelized and gorgeous.
This is that cake, my darlings.
This upside-down orange cake is everything I love about baking — it looks like it belongs in a French patisserie window, but it comes together so simply you won’t believe it. The texture? Incredibly moist with the most delicate crumb, thanks to olive oil and fresh orange juice working their magic together. The top (which becomes the bottom, then the top again — you know how upside-down cakes work ;)) gets this beautiful caramelized edge that shatters just slightly when you cut into it.
And here’s what makes my heart sing: no mixer required. Just a bowl, a whisk, and a little bit of your time. That’s it.
I’ve been obsessed with olive oil cakes ever since our time in France... there’s something about the way Mediterranean bakers use olive oil that creates this tender, almost velvety crumb you simply can’t achieve with butter alone. When I combined that with bright orange zest and fresh-squeezed juice, oh! It was love at first bite. My husband kept sneaking slices before I could even photograph it properly, rffff.
Before You Begin
Don’t be intimidated by the “upside-down” part, I promise you — if you can line a pan and flip a plate, you’ve got this. The trick is letting the cake cool just enough (but not too much!) before the big flip. I’ll walk you through every step.
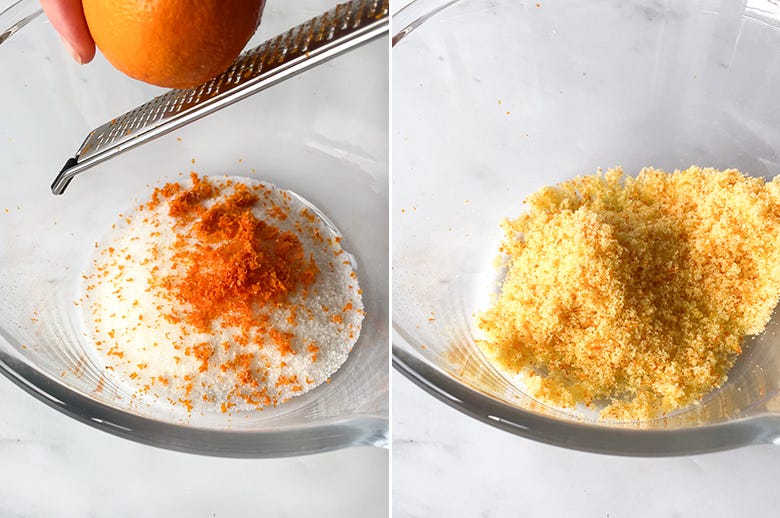
One little secret: rub that orange zest into the sugar with your fingers until it’s fragrant and slightly damp. This releases all those gorgeous essential oils and distributes the flavor throughout the entire cake. Trust me on this one — it makes all the difference.
Ingredients
Pan size: 20-22 cm (8-9 inch)**
For the topping:
oranges (I used 2 different varieties) - 2-3
melted butter - 40 g
sugar - 50 g
For the batter:
sugar - 200 g
orange zest - 2 tsp
eggs - 3
vanilla extract - 1 tsp
olive oil - 180 ml
fresh orange juice - 180 ml
flour - 300 g
baking powder - 1 tsp
salt - ½ tsp
Instructions
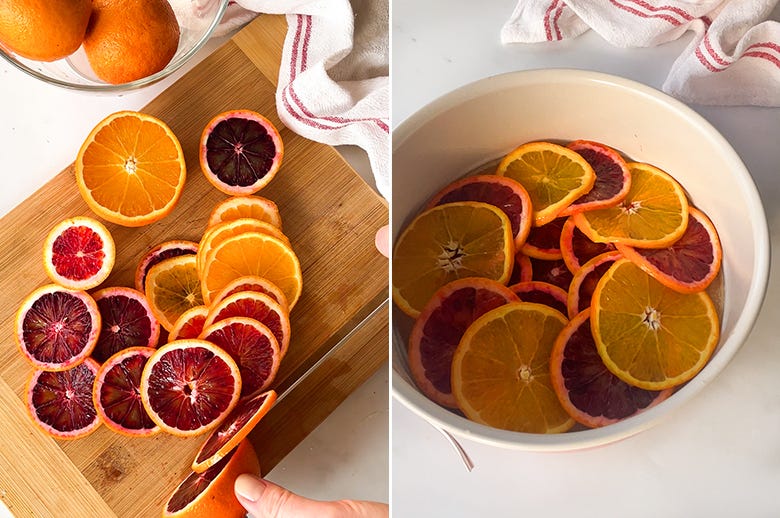
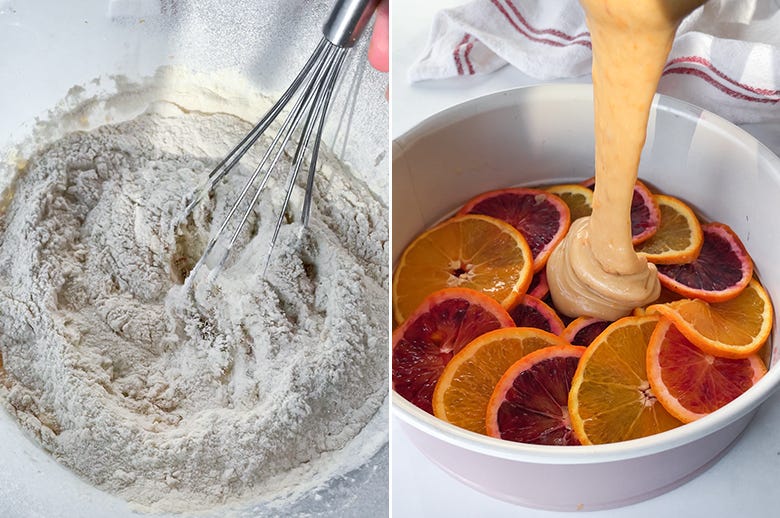
1. Wash your oranges really well. Zest three oranges and squeeze them for juice. Slice two to three oranges into thin, thin rounds — you want them almost translucent. Set aside. Preheat your oven to 180°C (360°F). Prepare your baking pan (a springform works best here) — line the bottom with parchment paper so the cake releases easily later.
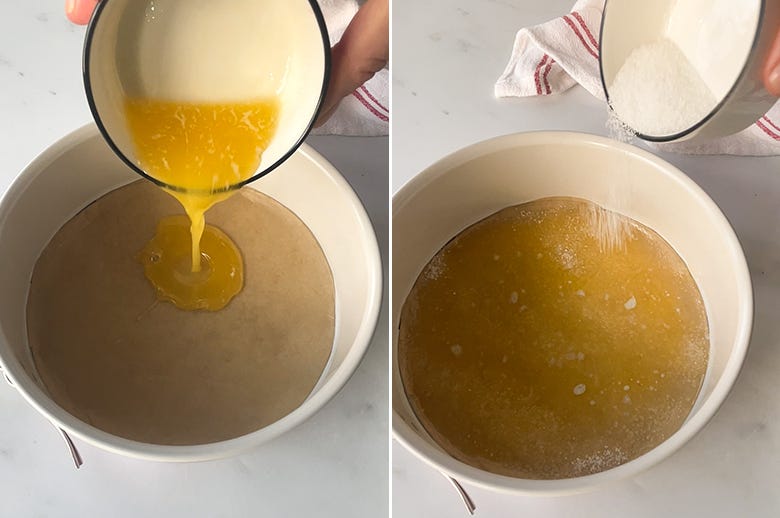
2. Pour the melted butter into the prepared pan and spread it around to coat the entire bottom. Sprinkle the sugar evenly over the butter (this is what creates that gorgeous caramelized top!).
3. Arrange your orange slices on the bottom of the pan in whatever pattern makes your heart happy. Overlapping is fine, beautiful even. Set the pan aside while you make the batter.
4. Now for the magic: combine the orange zest with the sugar in a bowl and rub it together with your fingers. Really work it until you can smell the oranges and the sugar feels slightly damp. Mmm... your kitchen already smells incredible.
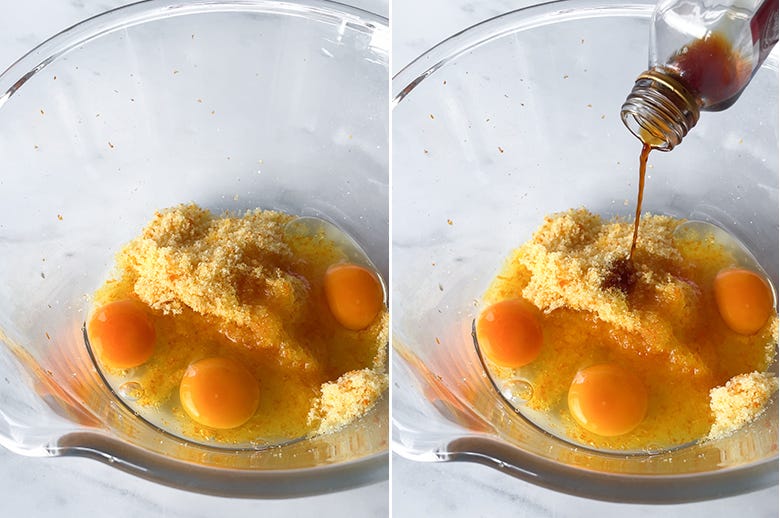
5. Add the eggs and vanilla extract to the orange sugar. Whisk until combined — a hand mixer works, but a regular whisk is perfectly fine too.
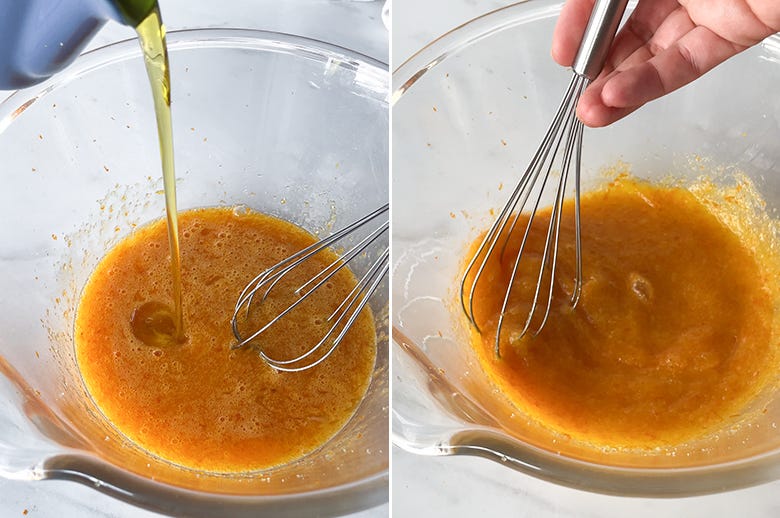
6. Pour in the olive oil and whisk until smooth and emulsified.
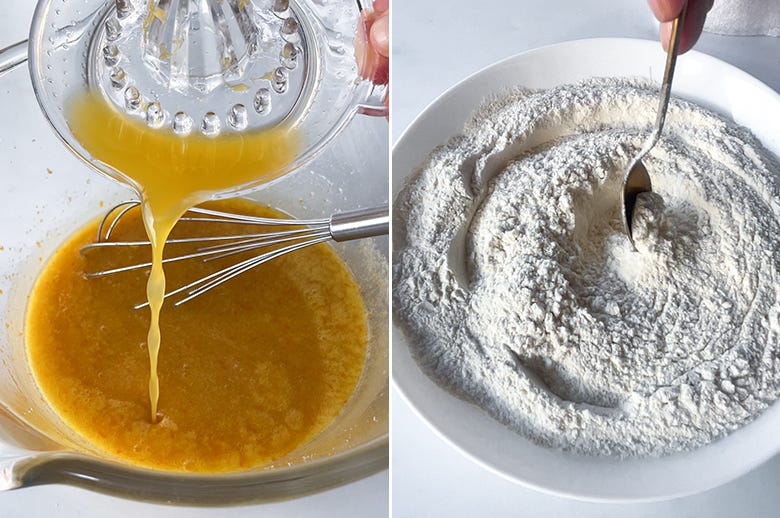
7. Add the orange juice and give it a stir. In a separate bowl, whisk together the flour, baking powder, and salt, then sift this into your wet ingredients. Mix until you have a smooth, pourable batter (don’t overmix — just until everything comes together).
8. Gently pour the batter over your arranged oranges, being careful not to disturb them too much. Use a spatula to smooth the top.
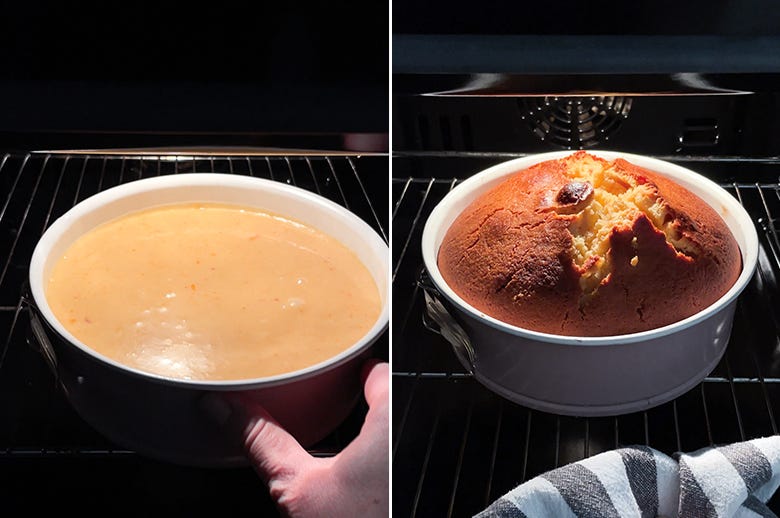
9. Bake for 25-35 minutes, or until the top is golden and a toothpick comes out clean. You’ll know it’s ready when the edges pull away slightly from the pan and the whole thing smells absolutely divine.
10. Let the cake cool in the pan for 5-10 minutes — not longer! Run a knife around the edges if needed, place a serving plate over the pan, take a deep breath, and confidently flip the whole thing over. Lift off the pan and peel away the parchment.
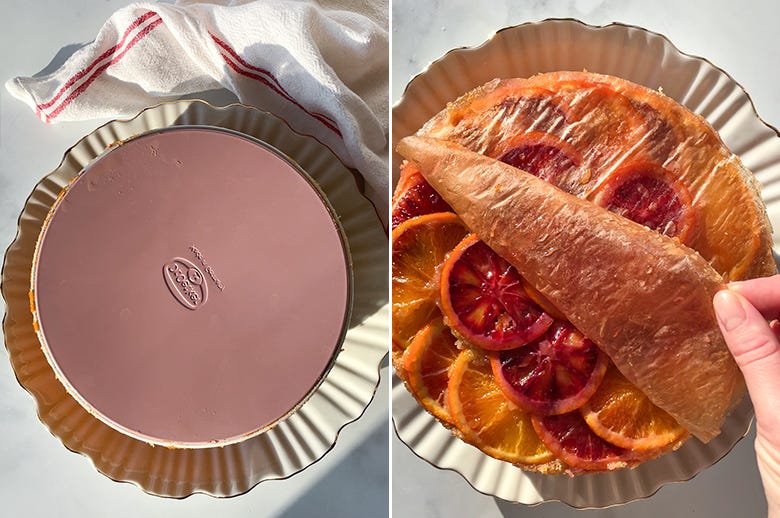
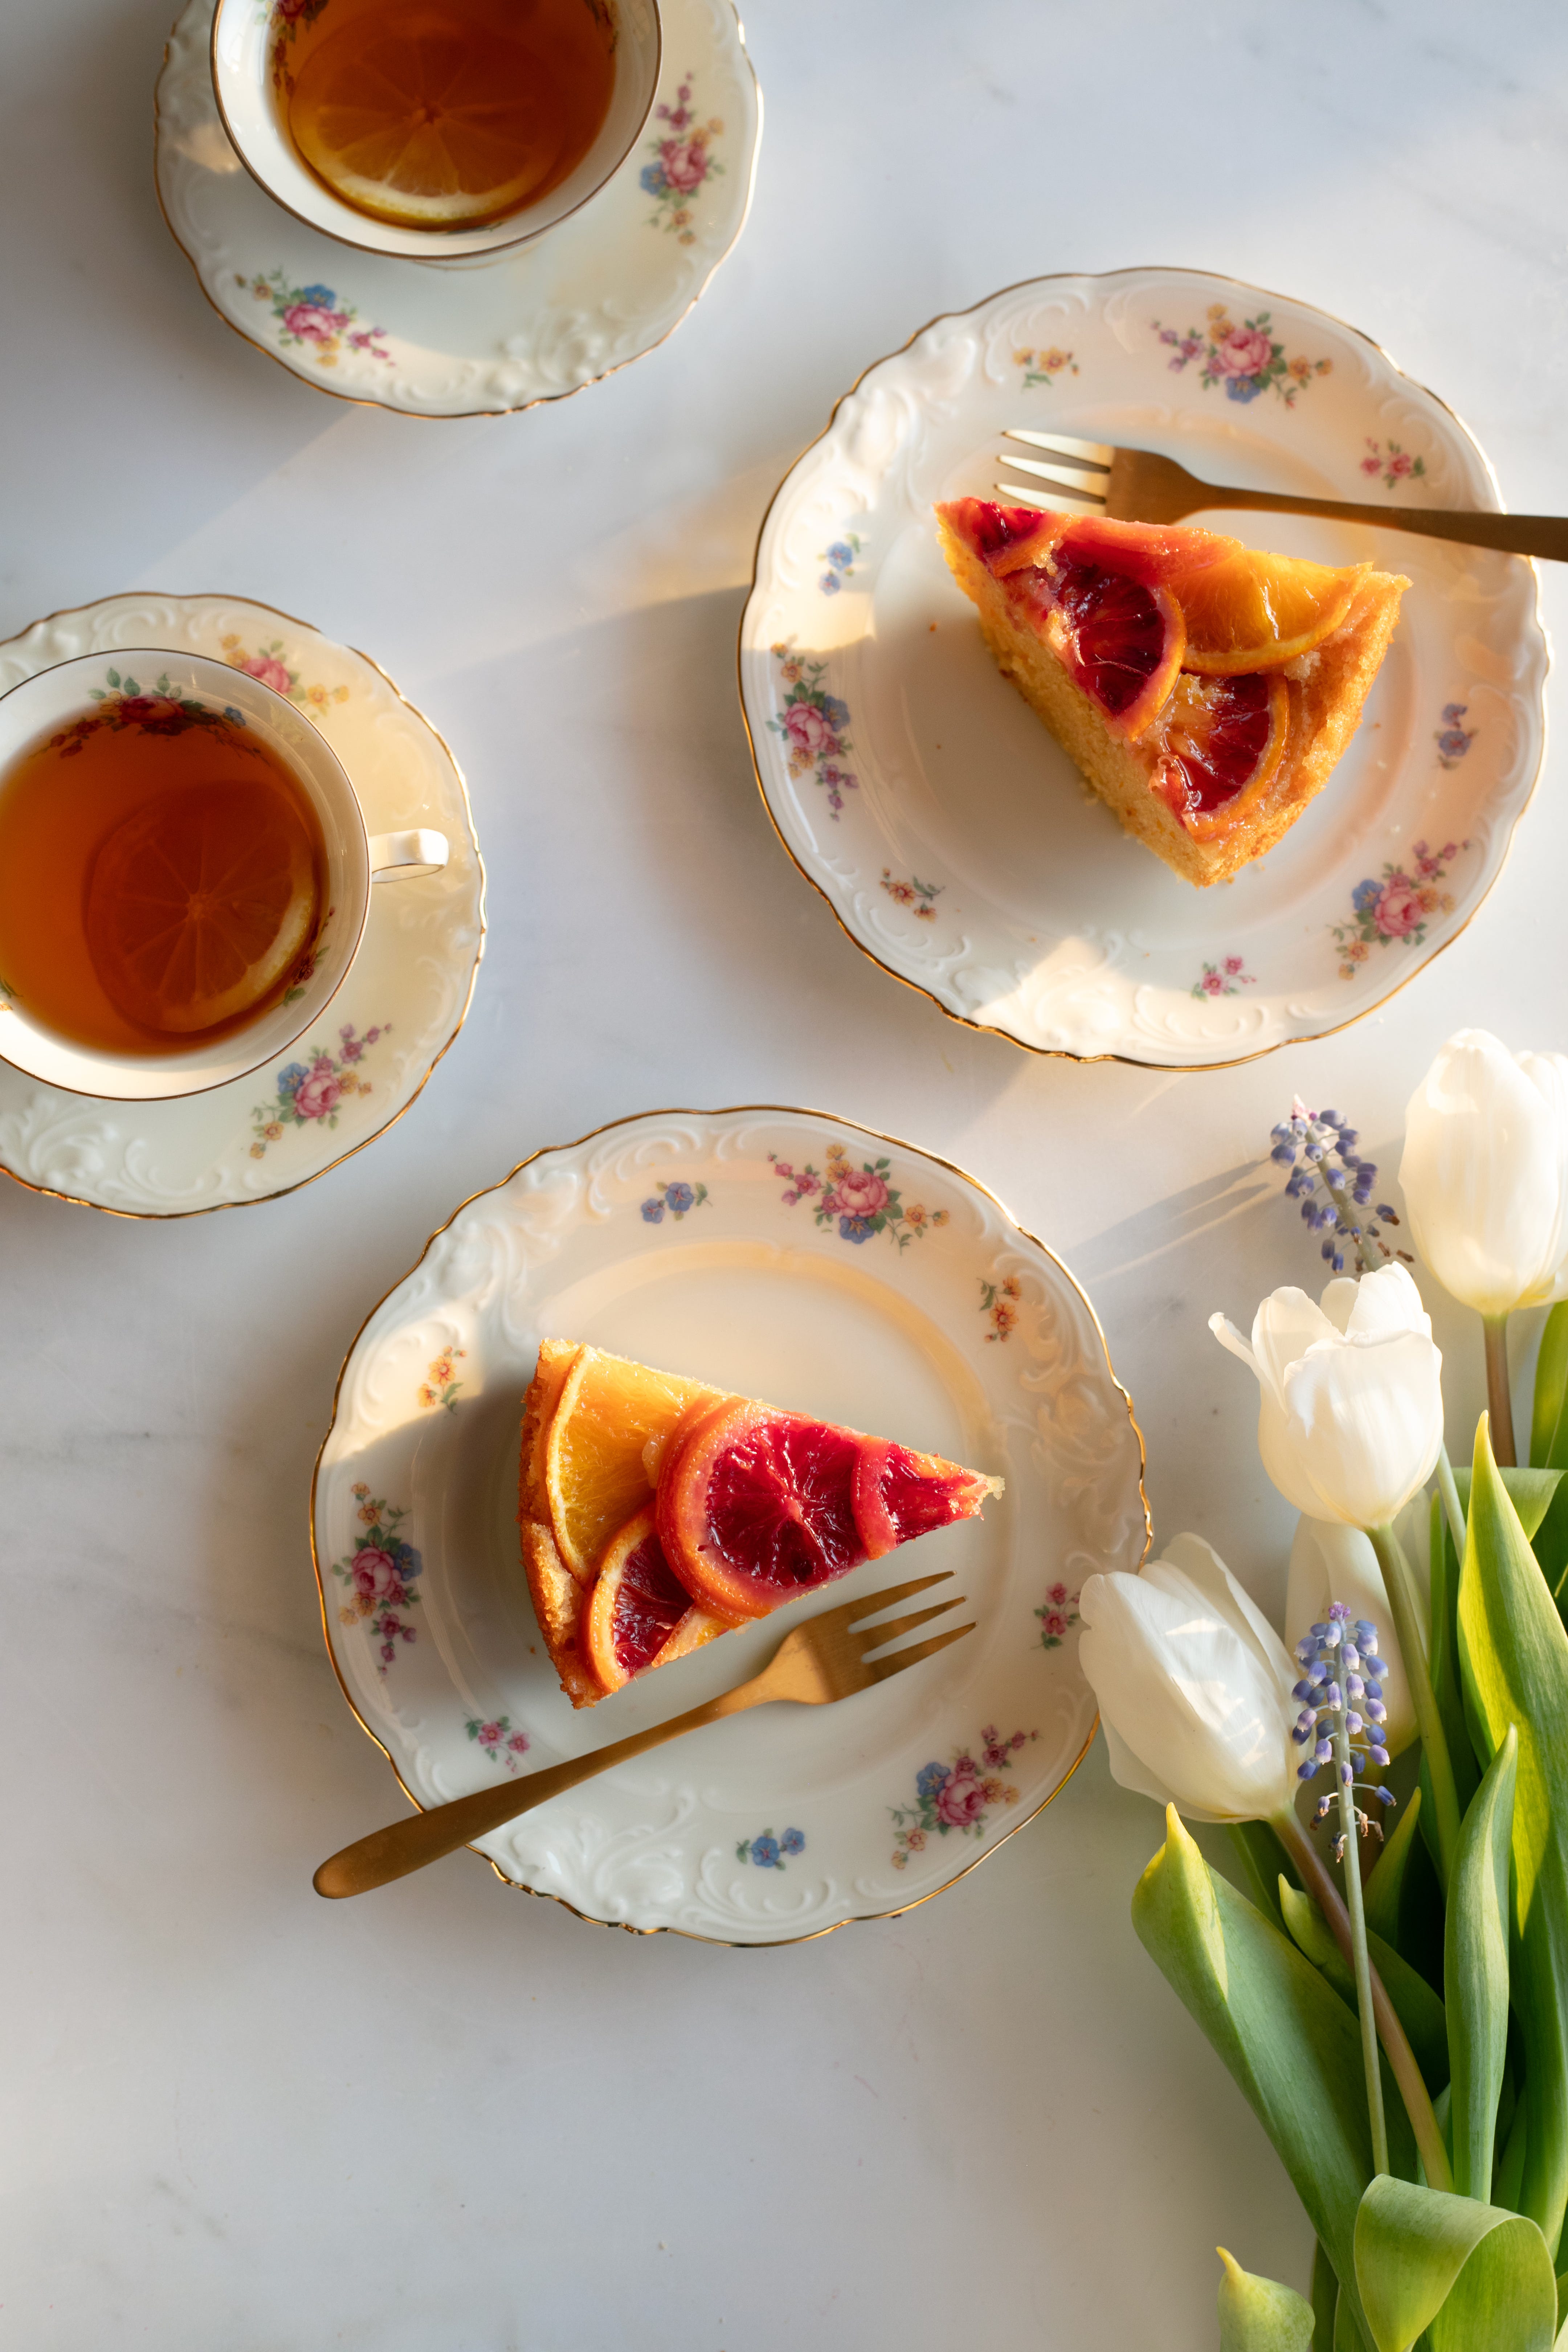
11. Let it cool a bit more, slice, and enjoy every single bite.
Tips & Notes
- The flip: Don’t wait too long or the caramel will stick. Don’t flip too soon or the cake might break. 5-10 minutes is the sweet spot.
- Orange varieties: Using two different types of oranges (like navel and blood orange, or cara cara) gives you beautiful color variation.
- Make ahead: This cake is actually better the next day — the flavors deepen and the texture stays moist. Store covered at room temperature.
- Serving: Wonderful on its own, but a dollop of crème fraîche or lightly sweetened whipped cream takes it over the top.
This is the kind of cake you make when you want to impress someone without spending hours in the kitchen. It’s the kind of cake that makes people ask for the recipe before they’ve even finished their slice. It’s simple, it’s elegant, it’s utterly delicious.
Go make it. You’ve got this :)
— Victoria